If you search for how to use GPT Image 2, most pages stop at basic prompt tips. That is not enough once the output needs to ship.
The hard part is not getting one attractive image. The hard part is getting a usable image with readable text, stable layout, believable lighting, and a revision path that does not force you to restart from zero every time.
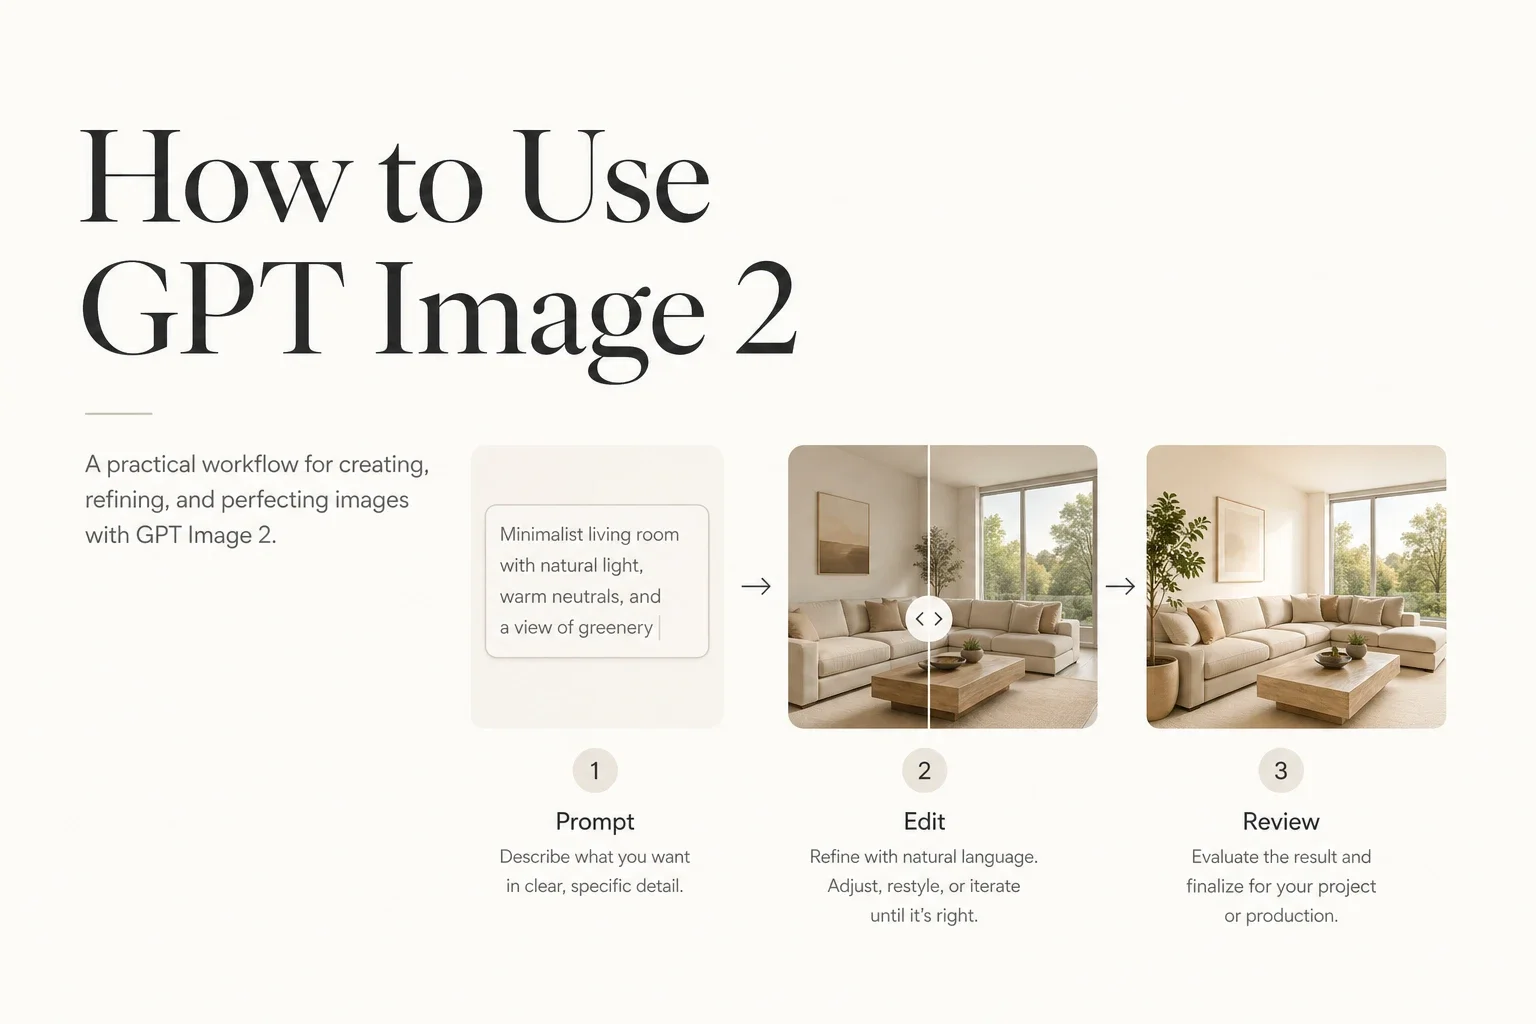
This guide focuses on the practical workflow:
when to generate from scratch
when to edit instead of regenerate
how to write prompts for posters, diagrams, and product visuals
how to review results before they become campaign assets
On Veo 4, is the production workflow name for using OpenAI image-generation capabilities inside a browser-based creator flow. As of May 1, 2026, OpenAI's official documentation describes the current GPT Image family through the Image API and Responses API, including support for generation and editing. That distinction matters because naming can change faster than the practical workflow.
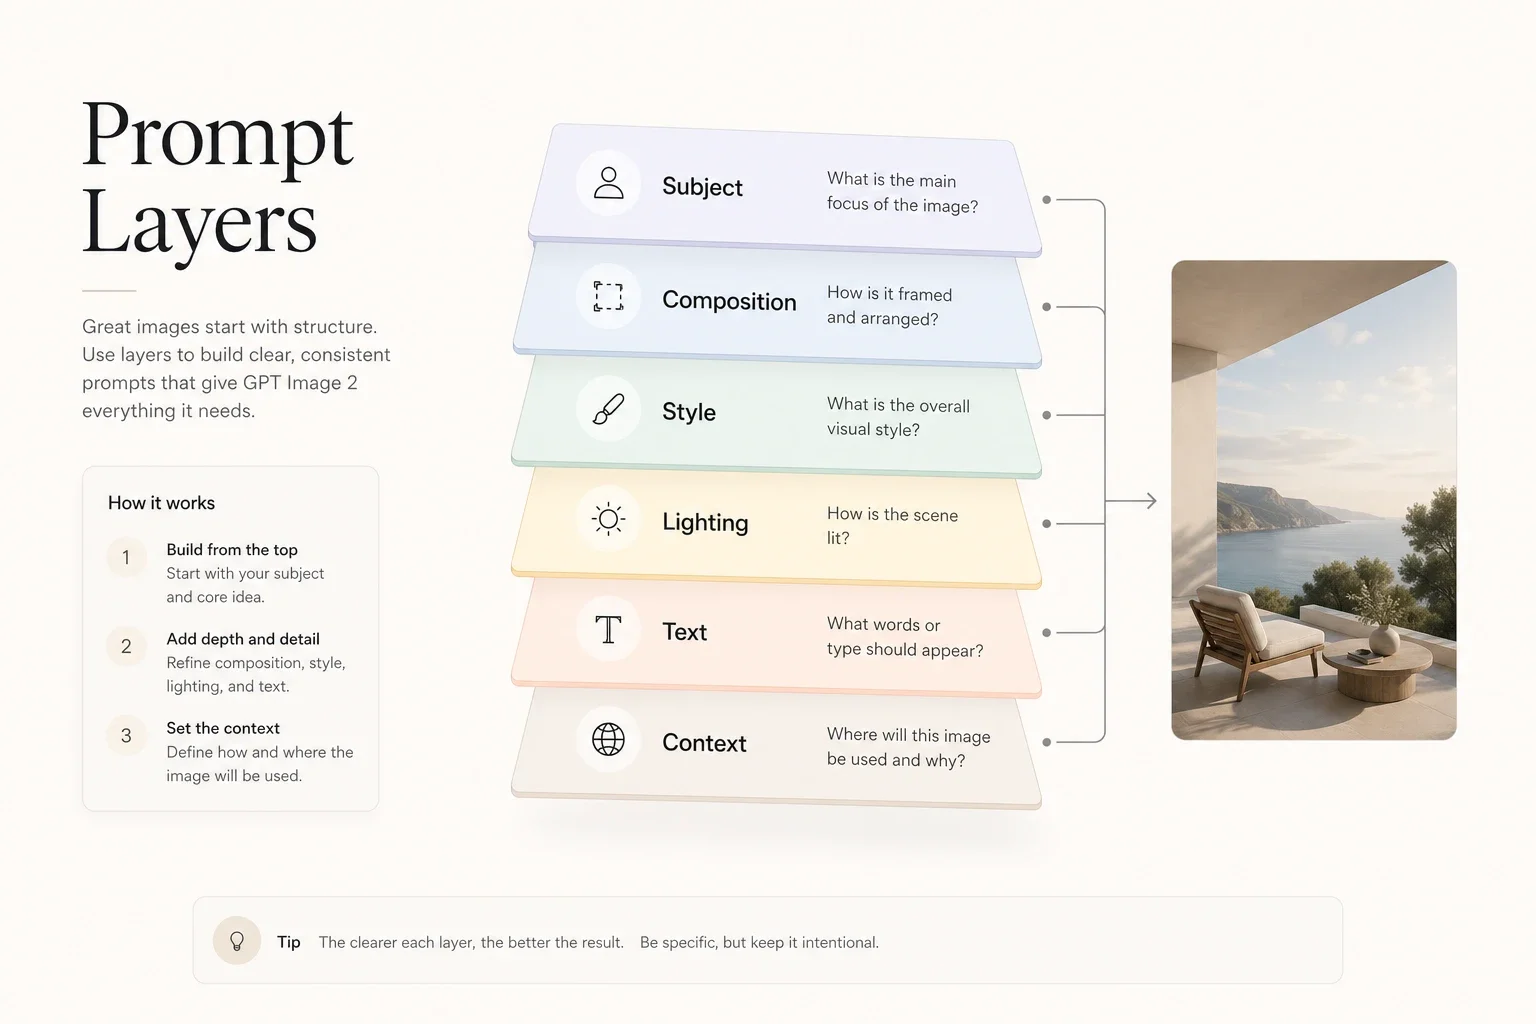
Start with a clear output type, write the prompt in layers, choose generation or editing on purpose, and review the result for text, hierarchy, and commercial readiness before you move on.
This is the fastest safe workflow:
Step
What to decide
Good default
1
Output type
Poster, product visual, diagram, UI board, portrait, or ad asset
2
Working mode
Generate from scratch for new scenes; edit when the base image is already close
3
Prompt structure
Subject, layout, style, lighting, text, and channel
4
Success criteria
Readability, composition, realism, and brand fit
5
Revision loop
Fix one failure class per round instead of rewriting everything
The strongest use cases are the ones where structure matters as much as style.
That usually means:
posters with visible headline text
diagrams and explainers that need labels
landing-page visuals with product hierarchy
product concepts that must survive several edit rounds
polished editorial or photoreal scenes with many prompt constraints
The common thread is control. If your brief includes subject, camera, palette, text, spacing, and intended channel, GPT Image 2 is more useful than tools that only shine on one-shot aesthetics.
centered layout with large headline space and one hero object
Style
Editorial, photoreal, illustrated, brand mood
clean editorial design with restrained premium styling
Lighting and materials
Light direction, texture, surfaces, realism cues
soft side light, matte glass, subtle reflections
In-image text
Exact copy that must appear
"Design Faster with Better Control"
Delivery context
Landing page, ad creative, blog hero, deck slide
sized and composed for a landing-page hero
That structure is boring on purpose. Good boring prompts outperform flashy messy prompts.
Here is a base template:
Create a [output type] featuring [main subject].Use [composition and framing].The style should feel [style direction].Lighting and materials: [light, texture, surfaces].Visible text: "[exact text]".Make it suitable for [delivery context].Avoid clutter, unreadable text, extra objects, and off-brand colors.
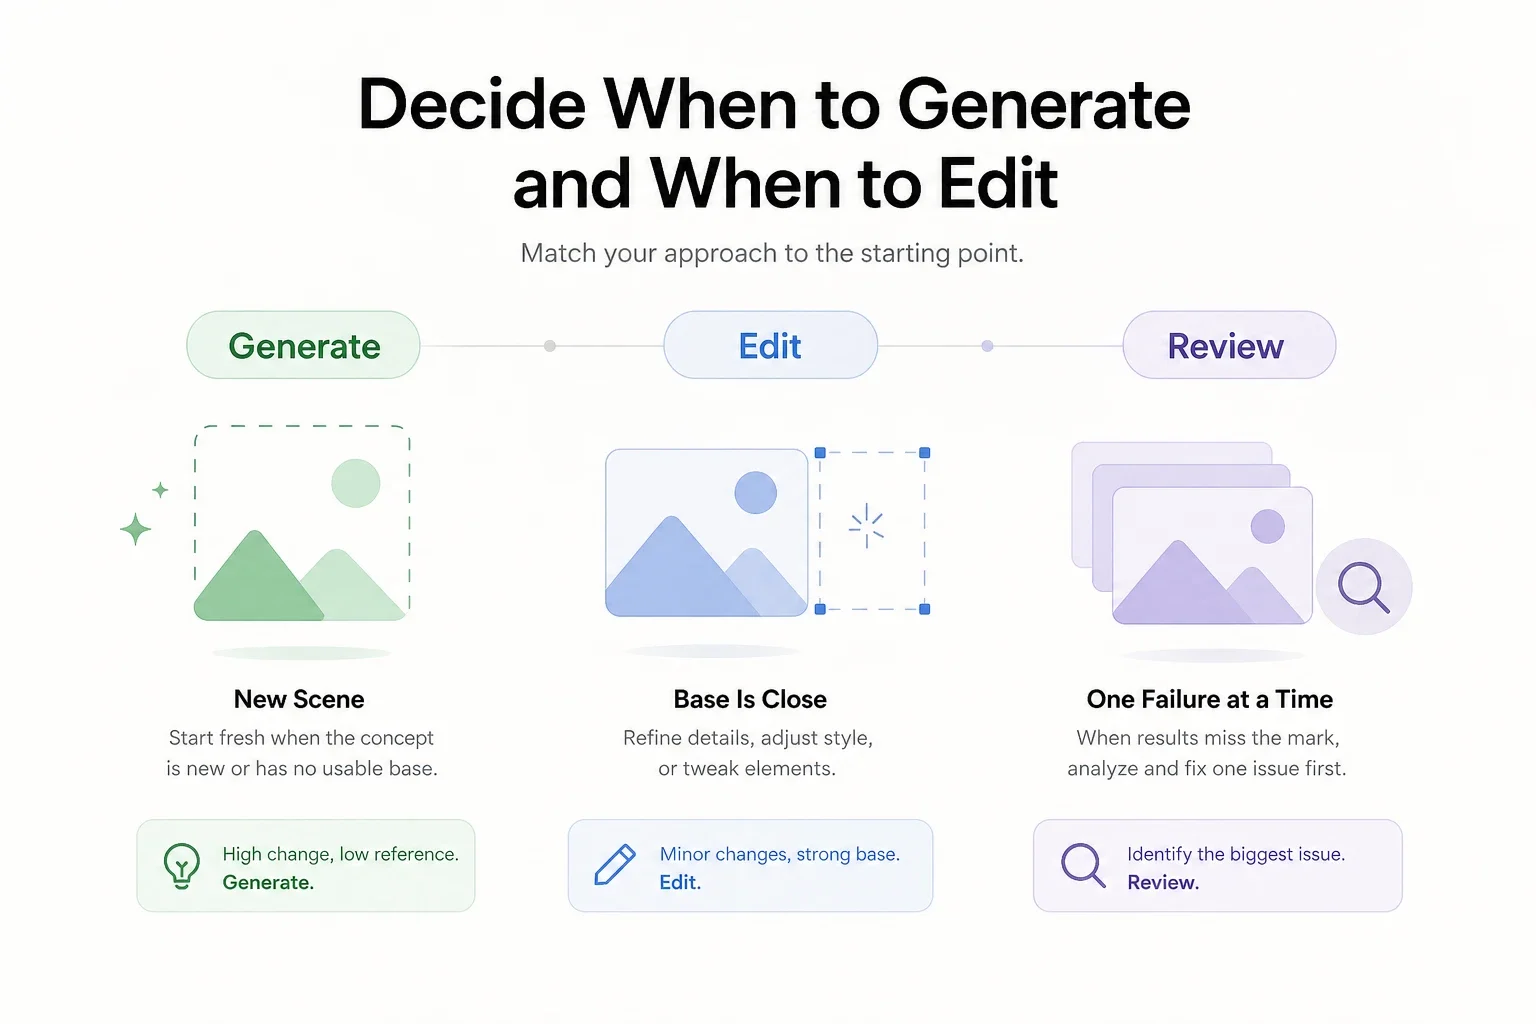
Many teams waste time because they regenerate scenes that should have been edited.
Use generation when the scene itself is new. Use editing when the composition is already close and only part of the asset is wrong.
Mode
Use it when
Typical fixes
Generate
You need a new scene, new layout, or new visual direction
First concepts, moodboards, new posters, fresh product scenes
Edit
The base image is almost right
Replace text, adjust object details, change color mood, simplify layout
Regenerate after review
The whole concept is structurally wrong
Wrong camera angle, wrong subject, broken hierarchy, unusable scene logic
The practical rule is simple:
if the image has the right idea but the wrong details, edit
if the image has the wrong idea, regenerate
This is especially important for product marketing work. When you already like the framing, do not gamble on a totally new result unless the current image is beyond repair.
This is where many image models break. GPT Image 2 performs best when you keep the copy short and the hierarchy explicit.
Best practice:
lock the headline before generation
use one main line and one optional sub-line
describe where the text should sit
say what should stay empty
Example:
Create a clean campaign poster for an AI design tool.Centered editorial layout with one product object and generous whitespace.Headline at the top: "Design Faster with Better Control".Small subheading below: "Prompt, edit, and export in one workflow".Soft gray background, silver-blue accents, premium modern typography.Make it suitable for a social ad and a landing-page hero crop.
one browser-based place to prompt, review, and export
a clean path into the dedicated GPT Image 2 workflow
pricing context before heavier usage through /pricing
adjacent image and video tooling without rebuilding your process from zero
If your team also produces image-edit-heavy assets, compare this workflow with Nano Banana 2 Prompt Guide. The choice is usually simple: use GPT Image 2 when layout, text rendering, diagrams, and structured briefs matter more; use an edit-first workflow when conversational revisions and reference-driven changes dominate.
It is strong for commercial drafts and often strong enough for production visuals, but every output still needs a human review for text accuracy, brand fit, and factual correctness.
The fastest way to use GPT Image 2 well is to stop chasing novelty and start chasing control.
Define the job, structure the prompt, choose generation or editing deliberately, and review the result with production standards instead of demo standards. That workflow produces fewer wasted generations and many more assets you can actually ship.
How to Use GPT Image 2: Prompts, Edits, and a Workflow That Ships
The Short Answer
What GPT Image 2 Is Best At
Step 1: Choose the Right Job Before You Write the Prompt
Step 2: Write the Prompt in Layers
Step 3: Decide When to Generate and When to Edit
Step 4: Prompt for the Three Workflows That Matter Most